Whether it’s your first time painting a room or you’re practically a pro, just thinking about everything you need to gather up can be just a tad overwhelming.
To be honest, although I’ve painted a feeeew rooms in my day, I still put off my painting projects as long as possible for just that reason.
Which is why I’ve put together this interior painting supply checklist!
Now you (and I) can simply scroll through the list and jot down anything we don’t have on hand – or add it to the ol’ Amazon cart. (Yep, I’m including some handy-dandy links to my best product recommendations to make everything just that much easier for you!)
Firstly, I’m going to give you the simplified version of all the supplies you need to paint a room, in case you’re in a hurry.
A little farther down the page, I’ll give a brief explanation, recommendation, or tips for using each of the items, because some of them might not be super obvious.
With that said, let’s get to it!

This post may contain affiliate links and we may earn commissions when you click on the links at no additional cost to you. See our disclosure policy for more details.
What Supplies Do I Need To Paint A Room?
It’s a long list, but don’t worry – you may not need absolutely everything on it. For example, if you plan on rolling out the paint, you probably won’t need a sprayer. Just scroll through and pick out the items you do need.
Not sure whether you need something or not? Fear not! Stick with me, and I’ll explain each item in a little more detail shortly.
And now for the quick version of the painting supply checklist….
- Primer
- Paint
- Paint can opener
- Screwdriver
- Stir stick (or paint mixer drill attachment)
- Spackling paste
- Caulk
- Sanding sponge
- Painter’s tape
- Paint tray
- Paint tray liner
- Paint pail
- Paint pail liner
- Roller frame
- Roller covers
- Extension pole
- Paintbrushes
- Edgers
- Paint sprayer
- Drop cloth
- Paint scraper
- Paper towel or rags
- Ladder
- Paint thinner
- Disposable gloves
- Cleaning sponges
- Trash bags
- Bucket
Before You Get Started….
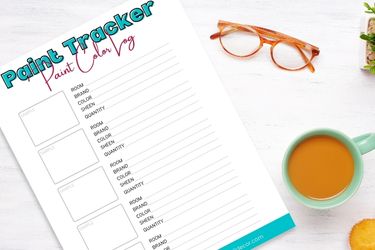
A quick note: Be sure to keep track of all your paint information (brand, color, etc.) for each room as you go, or you could run into trouble down the road.
I get it – it’s not something you want to worry about in the moment, but your later self will thank you! Trust me, it’s no fun to repaint an entire wall simply because the paint store can’t make a close enough color match for a few tiny spots on the wall.
You could:
- Write it down on the back of a switch cover in each room.
- Keep the paint cans and write the room name on each lid.
- Download my free printable paint tracker.
If you download my paint tracker, be sure to keep it somewhere you’ll know where to find it! You can print as many pages as you need, and keep them in a folder or even a three-ring binder.
Pro Designer Tip: A binder works great for keeping track of all your painting project information! Keep a copy of my printable Paint Planner Bundle in a three-ring-binder so that you can easily track all of your contractor quotes/information, estimate how much paint you need, track your budget, and more.

Can A Beginner Paint A Room?
Yes, of course a beginner can paint a room! I’m not saying it’s easy, by any means, but we all have to start somewhere. This might as well be your first time – especially if it’s a smaller room.
No idea where to begin? No worries! I’ve outlined everything you need to know about painting walls for beginners here.
In the above post, we cover color selection, estimating how much paint you need, prepping the walls — and, of course, how to paint a wall with a brush and/or a roller. Finally, I’ll share a few helpful wall painting tips before we part ways.
Choosing Paint Colors
Even if you’re a beginner, you’re most likely aware that choosing paint colors is the first step toward painting your walls. (Already selected your colors? Feel free to skip this section.)
If you’ve never had to choose paint colors before, it can be pretty overwhelming. After all, there are thousands of paint colors to choose from!
First of all, do you know where you will be buying your paint from? If you do, that’s a good first step. You can look on their site for inspiration, and you might even be able to order sample swatches to try out.
Otherwise, you can grab a copy of my How to Choose Paint Colors With Confidence five-step action guide.
Preparation
The first step in painting your room is preparing the surface. This means cleaning the walls, filling in holes, and sanding down rough spots. Let’s go over the list of preparation supplies you’ll need.
Screwdriver
First things first! Use a screwdriver to remove all the switchplates and outlet covers from around the room. Simply loosen the screws and keep everything together so you can replace them once the paint is dry.
Paint Scraper
Pull nails out of the walls and use a paint scraper (or 5-in-1 tool) to scrape cracked or flaking paint. You’ll also want to peel off any tape and remove sticky residue at this time.
Sanding Sponge
For any remaining minor imperfections, a fine-grit sanding sponge will help to even out the walls.
Spackling Paste
Use spackling paste to fill nail holes and cracks, and then remove excess spackle from the walls using a putty knife (or a 5-in-1 or 10-in-1 tool). It will need to dry completely (according to the supplied instructions) before cleaning or painting over it.
Caulk
Caulk may or may not be necessary, depending on the space you’re painting. But if you need a waterproof filler (around a sink or bathtub, for example) then you’ll want to grab a tube of caulk, along with a caulk gun for applying it.
Painter’s Tape
Once the walls have been cleaned, dried, and any holes or cracks repaired, it’s time to tape off the baseboards, around doors and windows, and around fixtures, too.
I use either Frog Tape or Scotch Blue.
Sometimes I skip the tape and cut in VERY carefully – but this requires a lot of patience and a steady hand.
Drop Cloth
Use plastic drop cloths to cover up anything that can’t be moved out of the way, and you might want to lay some down on the floor as well. If you have some old towels on hand, you could try using those instead of plastic. Now you’re ready to put on some old comfy clothes and start painting the walls!
Painting
Now that you have all of the prep work out of the way it’s time for the fun part – painting the walls! (That’s the reason you’re here, right?) Here’s the painting supply list.
Primer
Primer seals the surface and provides a smooth area so that the paint can adhere, minimizing the chances of peeling and helps to provide a clean slate for your new color.
You’ll need one or two coats of primer if:
- The walls are porous (bare drywall, for example).
- The walls are glossy (like shellacked wood paneling).
- The walls have water or cigarette smoke stains.
- The walls have an odor from cigarette smoke or pets.
- There is coloring or “artwork” on the walls.
- The color is changing drastically.
In most instances, I prefer to use a separate primer, rather than a paint-primer. Your local paint supplier should be able to help you choose the appropriate primer for your surface.
Paint
There are lots of great paint options available today, including these ten best paint brands for interior walls.
The sheen you choose for your paint will depend on the space you’re painting and the look you’re going for. As a general rule, the shinier the finish, the more durable and washable it will be – but it will also show more imperfections.
You’ll find a guide to choosing the best paint sheen for bathrooms here.
You can brush, paint, or spray the paint onto your walls (more on that shortly!). I always apply at least two coats of paint – sometimes three if the first two coats didn’t provide enough coverage.
Interior Vs. Exterior
What’s the difference between interior and exterior paint?
- Interior paint uses organic pigments (that are safe to smell and don’t have harsh odors), while exterior paints may use non-organic, harsher pigments designed to resist fading.
- Interior paint uses silicone as the binding resin, while exterior paint uses more durable acrylic.
- Exterior paint is more durable and resistant to physical damage (including temperature, mildew, moisture, fading, and scratching) as compared to interior paint.
- As such, exterior paint also has more additives than interior paint to combat weather conditions.
- Interior paint is low in VOCs, while exterior paint is not.
- Exterior paint offers better adhesion — and also requires sunlight to cure, while interior paint does not.
- Exterior paint dries up at a faster rate, because it is exposed to constant airflow and heat
In a nutshell, you just need to be aware that there is a difference between interior and exterior paint. Be sure to check the labels and ask your paint retailer to give you the right type of interior paint for your project.
Paint Can Opener
Paint cans are impossible to open without the right tool! You should get a paint can opener with your cans of paint, but if not, you can grab one right here. You could also use a flathead screwdriver in a pinch.
Stir Stick (Or Drill Attachment)
Most paint stores will give you a stir stick or two with your paint order. But if you prefer, you can get a drill attachment that will blend the paint easily and thoroughly. The pigments start separating in between uses, so always make sure to stir the paint before each use.
Roller Tray
If you plan to use a roller, then you’ll need to pour some paint into the paint tray. Rolling might not allow you quite as much control, but it does get the job done more quickly, and provides a nice, even finish.
Roller Tray Liner
A disposable roller tray liner will keep the tray clean. If you don’t use one, then you’ll need to clean and dry your roller tray after every use.
Paint Pail
Before painting with a brush, pour some paint into a smaller paint pail with a handle for portability.
Paint Pail Liner
You can either use a disposable liner or you can wash and dry your paint pail after every use.
Roller Frame
Roller frames come in a few different sizes, but you’ll typically use a 9” roller for a wall. You should only need one frame, but you might need multiple roller covers, depending on the scope of the project.
Roller Covers
A roller cover is the fluffy tube that slides onto the frame. It’s what applies the paint to the wall. The biggest part of choosing a roller cover is knowing which nap you need. Generally, the heavier the texture on your walls, the thicker the nap. Smooth walls require a pretty minimal nap.
Extension Pole
An extension pole attaches to the handle of your roller frame. It enables you to reach farther up the wall and extends the amount of wall you can paint at a time. (You might even be able to remove the handle from your broom and thread it onto your roller handle!)
Paintbrushes
A 1.5″ to 2″ angled brush will help you get up nice and close to the edges (without making a mess on your ceiling). The smaller brush size will also keep your wrists from getting sore too quickly. Then, if you plan on filling in the rest of the wall with a brush rather than a roller, you’ll want to use a wider paintbrush.
Related: Best Paint Brush for Cutting in Ceiling: 10 High Quality Options
Edger
Paint edgers create a buffer that keeps the paint brush or roller from coming too close to the ceiling or trim. To be honest, I haven’t personally used one because I’m pretty comfortable cutting in with an angled brush, but I can definitely see how it would be useful (and make cutting in much faster!).
I think I’ll try one out the next time I paint to see how much time it shaves off. 🙂
Paint Sprayer
There are benefits and drawbacks to using a paint sprayer. (I typically use a brush and roller when painting indoors.)
A sprayer could help you paint more quickly and evenly – just be sure to buy extra paint, since it doesn’t go as far when spraying. A general rule of thumb is about 200 square feet per gallon of paint.
Ladder
If you have tall ceilings, you’ll definitely need a ladder. Even with standard height ceilings, you’ll want a step-stool when cutting in around the ceilings.
Clean Up
Whew! Even with the smallest rooms, painting is a big job, so way to go! But we’re not done yet… Time to clean up. (Sorry!)
Here’s what you’ll need.
Paper Towel or Rags
Paper towels or damp rags will help with “oopsies” along the way, such as splatters or drips. No matter how careful you are, it’s bound to happen!
Paint Thinner
If you’re using regular latex (water-based) products, you should be able to clean up your painting tools with water. However, any oil-based products will require mineral spirits paint thinner to clean up.
You can wrap wet brushes and roller covers with saran wrap between coats to keep them from drying out, but make sure to clean and dry them thoroughly after every painting project.
Disposable Gloves
When using paint thinners, you should wear disposable gloves to avoid contact with your skin.
Sponges
You’ll need sponges for both cleaning the walls before painting and for cleaning up any spills afterward.
Bucket
You’ll also need a bucket to fill with water when cleaning the walls (prior to painting) and for cleaning up any messes during or after painting.
Trash Bags
Keep a trash can or trash bags handy for tossing paper towels, wet painter’s tape (yes, make sure to remove it before the paint dries!), and any other trash while painting and cleaning up.
Final Thoughts
…and that’s a wrap! I know this interior painting supply checklist is a little on the long side, but there are a lot of things you might need, and I didn’t want to leave anything out.
No, you might not need absolutely everything on the list – of course, you’ll look it over and jot down the supplies you DO need, skipping over any that don’t apply. And if you need any product suggestions, check out the details I’ve provided for each item. Good luck!
Read More:
How to Choose Wallpaper for a Small Living Room (+ Our Top 7 Picks)
Pros and Cons of Painting Your Ceiling the Same Color as Your Walls

